X-150 - A Micro Turbojet Engine
Watch me build my engine from scratch !
| Back | Next |
|
X-150 - A Micro Turbojet Engine Watch me build my engine from scratch !
|
Nozzle Guide Vanes (NGV) and Rear Cover |
|
Picture |
Description |
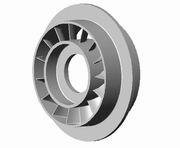 |
NGV acts as stator to the turbine, it doesn't have to be dynamically balanced so the manufacturing requirement is not as high as that of the rotor, but the material still need to be heat-resistant due to it is subjected to direct heating of the combustion gas. Lower graded inconel or heat-resistant stainless can be done. |
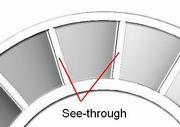 |
This is the see-through spacing to prevent surging. We need to have see-throughs between vanes to not to restrict the combustion gas too much, or the compressor might have to suffer surging. Don't worry the see-through spacing is not going to make any trouble for you ! |
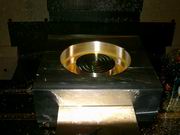 |
NGV wax mold under CNC machining. This mold is machined by a YCM 3-axis CNC mill equipped with advanced FANUC 18i-MB controller. I follow strictly the philosophy of DFM (Design For Manufacturing), that is why a 3-axis CNC machine is quite enough for me to build many things. I do have access to a 5-axis machine but I won't use it unless necessary ! |
 |
The EDM electrode for building our NGV wax mold. Mold making needs high precision equipment and minds. You cannot think of a design at your will and want us to build the part for you, there's a an important issue of manufacturability, let me repeat the philosophy I advocate : Design For Manufacturing ! |
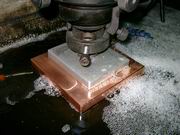 |
NGV upper mold under EDM processing. Two EDM electrodes need to be build, that is, one for upper mold and one for lower mold. From these tedious steps I hope you can understand that mold making is not a cheap process. It is very precise and expensive process. This EDM machine is made in Taiwan as well. |
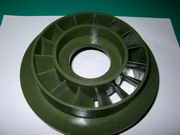 |
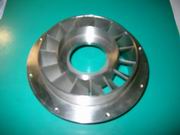
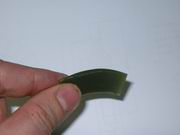
Finally the wax pattern is out. This is the product of the very first tryout, I stood by the wax machine and eye-witnessed the process. The quality is nice, can be used for casting without any problem. Heat resistant stainless steel 310 will be used to cast our NGV. Stainless 310 is a chromium-nickel steel, it is very expensive as the temperature of the operating environment is up to about 1100 deg C. Using a lower grade stainless will result in carbide precipitation in the metal leading to cracks. Yes this component looks like a chafing dish or "fire pot". :) |
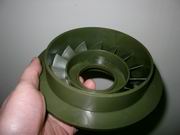 |
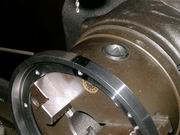
This is the "business end" where the turbine is installed. If we take a closer look at the vanes, we can see the detail of fillet at both ends of the vane, meaning even though this is relatively safe component, I didn't neglect any detail of it. These fillets will do their best to prevent tiny cracks from initiating, and ensure the mechanical strength of the vanes. All hard works paid off on seeing this wax, really. |
 |
Dimension check of wax pattern. You can simply use hot blade to cut whatever cross section you want, then have a thorough check of all the dimensions. |
 |
Dimension check of vane cross section. After all these dimensions are checked, we then proceed the next step, clustering. |
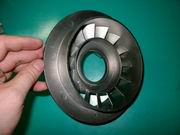 |
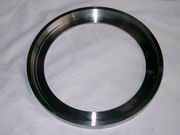
NGV as cast. Big success in our casting tryout. |
 |
NGV after lathe turning. Holes on the flange are not yet done. |
|
|
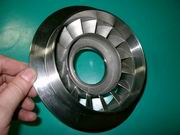
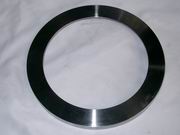
NGV flange drilled and tapped. |
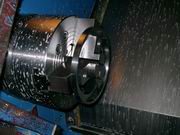 |
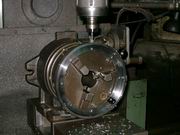
Rear cover. To connect the flange of NGV to outer casing we need this rear cover. Mild steel is used to fabricate this part. In the picture you see the work piece is secured in a 3-jaw chuck of a CNC lathe, and has just completed finishing cut. |
 |
Rear cover viewed from the front. |
 |
Rear cover viewed from the back. Lathe turning followed by drilling and taping are the processes needed for making this part. |
 |
Work piece of rear cover is secured on a 3-jaw chuck with index head to drill radial holes. To keep the axial holes and radial holes in phase, mark by black ink on the face of drilling area at a certain angle as start angle. |
 |
Drilling the radial hole of rear cover. |